TL;DR: Tamper-proof seals on speed governors make any interference obvious, fast. They protect the governor’s calibration, give inspectors and insurers something solid to trust, and kick off investigations if they’re missing or damaged. Done right, they save fleets from fines, downtime, and nasty insurance surprises.
Key Takeaways
- Tamper-proof seals on speed governors are mandatory in most regulated fleets because regulators want visible proof if anyone has tried to bypass or alter speed limits. No seal, no trust.
- Three main seal types are used in practice: wire seals, adhesive tamper-evident labels, and electronic tamper detection modules. Strong programs layer them rather than relying on just one.
- Every seal has a unique serial number that ties back to a calibration certificate and audit records, creating a clear chain of custody between a specific governor, vehicle, and technician.
- Inspection authorities routinely check seals during roadside checks and fleet audits, including physical condition, serial numbers, and, where fitted, any electronic tamper logs. A formal audit checks seals alongside calibration and configuration as part of compliance sign-off.
- A broken or missing seal is presumed tampering until you can prove otherwise. That usually means fines, enforced recalibration, possible insurance disputes, and the vehicle parked up.
- Resolute Dynamics’ tamper system uses a mix of physical wire seals and electronic detection with fleet dashboard alerts, so fleets see tamper events in close to real time instead of waiting for the next inspection.
- Good documentation and photographs of seal condition and changes form a vital fleet compliance seal audit trail, which can protect you in court or during an insurance investigation.
- Only authorised technicians or regulators should remove and replace seals, and every change needs to be logged and backed by a fresh calibration certificate seal with new serial numbers.
What Is a Tamper-Proof Seal on a Speed Governor?

A tamper-proof seal on a speed governor is any physical or electronic device that makes it obvious if someone has tried to open, bypass, or recalibrate the speed limiter. The idea is simple. You shouldn’t be able to touch the guts of the system without leaving fingerprints behind.
In real-world installs, those fingerprints usually look like:
- Wire tamper seals threaded through governor housings or connectors so any opening means cutting or destroying the seal.
- Adhesive tamper-evident labels that leave a “VOID” pattern or residue behind if someone peels or lifts them.
- Electronic tamper detection modules that sense enclosure opening or disconnection and log or broadcast a tamper event.
All of these seals are tied to a specific calibration certificate and stored in fleet records. That creates a reliable chain of custody that inspectors, insurers, and fleet managers can review and trust long after the work was done.
Why Tamper-Proof Seals Are Mandatory on Speed Governors
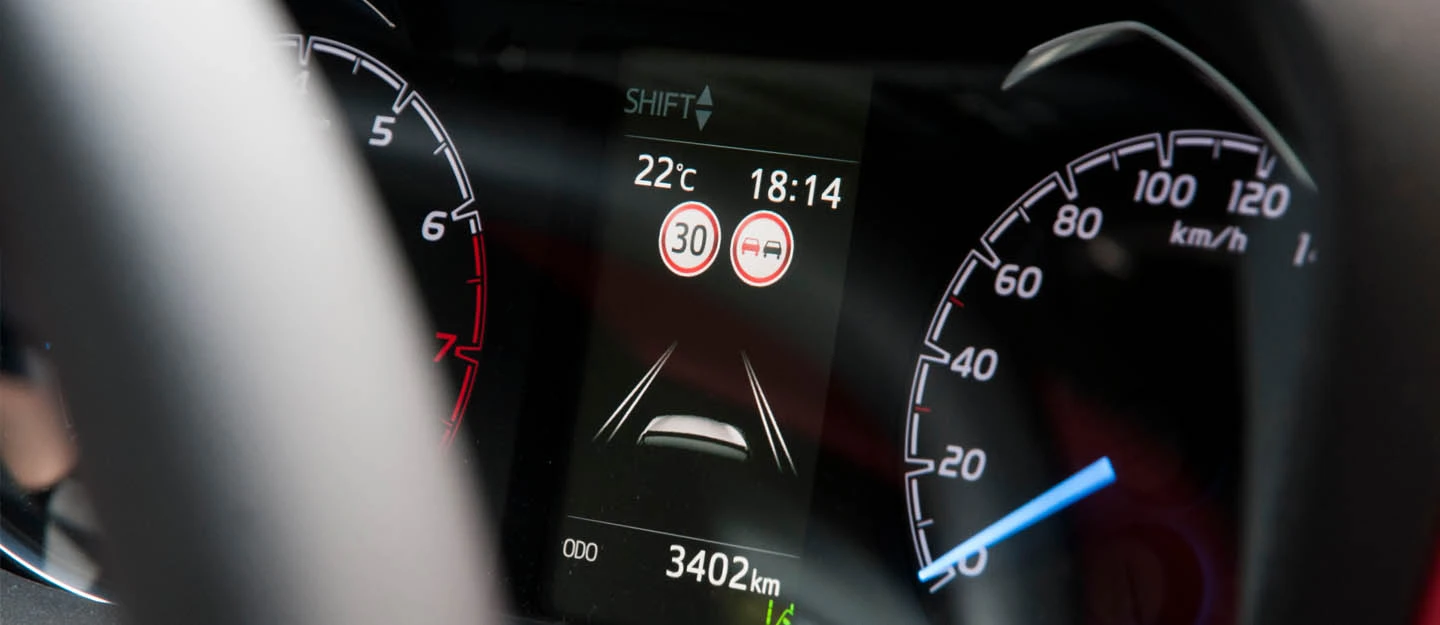
Speed governors are not just another black box under the dash. They directly cap how fast a vehicle can travel. If somebody cheats that limit, stopping distances change, impact speeds go up, and suddenly that truck isn’t operating the way it was certified.
Without tamper protection, it’s easy for a determined driver or an unqualified mechanic to crack open a unit, tweak the settings, or wire in a bypass. You won’t always see it in day-to-day operation, but you will see it when the vehicle is flying past traffic at a speed it was never cleared to run.
Regulators treat that as unacceptable. Speed governors (or speed limiters) on commercial vehicles, buses, and other regulated fleets are there to enforce road safety laws. Any uncertified access to a governor is a safety risk in their eyes, and they write rules accordingly.
Tamper-proof seals carry most of that burden in three ways:
- Deterrence: A clearly visible speed governor tamper seal tells drivers and workshop staff that if they mess with it, someone will notice. That alone prevents a lot of casual fiddling.
- Evidence: After a crash or enforcement action, investigators look at the seal. Intact, broken, or missing tells a story about whether the speed limiter was probably in its certified state.
- Accountability: Because each seal’s serial number is linked to a calibration certificate and technician ID, regulators can track who last had authorised access and when.
Since the hardware is cheap and very effective, most regulatory seal requirements make tamper-proof sealing a condition of roadworthiness. If an inspector finds a broken or missing seal, they’ll usually assume tampering until you can prove otherwise. Vehicles can be ordered off the road until the speed governor is inspected, recalibrated, resealed, and documented.
If you want the nuts and bolts of how calibration includes sealing as the last step, make sure your workshop processes line up with the official calibration guide from your regulator or OEM.
Types of Tamper-Proof Seals (Physical, Adhesive, Electronic)
Out in the field, speed limiter anti-tamper setups fall into three buckets: physical wire seals, adhesive labels, and electronic tamper detection. Each solves a different part of the problem. The most robust installs mix two or even all three, so a single weak link doesn’t take down your whole compliance story.
Here’s how the main options compare.
| Seal Type | Typical Use | How Tampering Is Evident | Detection Speed | Approx. Cost | Regulatory Acceptance |
|---|---|---|---|---|---|
| Wire tamper seal | Governor enclosure, connectors | Wire visibly cut, stretched, or missing; serial mismatch | On visual inspection | Low (USD cents per seal) | Universal |
| Adhesive tamper-evident label | Access covers, screws, ports | “VOID” or pattern left on removal; partial tearing | On visual inspection | Low–medium (per seal) | Most jurisdictions |
| Electronic tamper detection module | High-value, connected fleets | Automatic seal break alert in telematics / CAN bus | Seconds to minutes (near real-time) | Higher (per unit) | Growing acceptance as a complement |
Wire Seals
Wire tamper seals are the old faithful of governor sealing. Inspectors know them, workshops know them, and they’re hard to argue with during a roadside check. If the wire is intact and the crimp body looks untouched, chances are nobody has been inside that unit.
The typical setup is a short length of steel or plastic-coated wire routed through holes in the speed governor housing or critical connectors. The ends are locked into a crimped seal body that carries a unique serial number, stamped or laser-etched at the factory.
Key attributes of a wire tamper seal:
- Material: Usually twisted steel wire for strength and cut resistance, sometimes coated or swapped for high-tensile plastic in very corrosive environments.
- Break evidence: To open the enclosure or disconnect a sealed plug, the wire has to be cut, pulled apart, or forced. That leaves visible damage, loose strands, or a missing seal body.
- Serial number: Each seal is individually numbered so inspectors can match it to the seal certificate or calibration documentation attached to that vehicle.
- Cost per seal: Very low, usually a few cents in USD for basic types. That makes it affordable even for large fleets sealing multiple points per unit.
- Regulatory acceptance: Universal. Wire seals are the benchmark most inspection authorities expect and understand.
In practice, wire seals are your first line of defence for:
- Securing the main speed governor enclosure so it can’t be opened unnoticed.
- Locking high-risk connectors or any wiring point where drivers might be tempted to fit a bypass.
- Giving clear, tamper-evident proof during a routine speed governor seal inspection that nobody has been inside since the last calibration.
One mistake I see all the time is technicians reusing old wire or trying to “fix” a stretched seal. Don’t. If a seal looks questionable, you treat it as broken and replace it, with fresh serial numbers and paperwork.
Adhesive Tamper-Evident Seals
Adhesive tamper-evident seals step in where you can’t run wire, or where you want a second barrier on top of a wire seal. Think of them as controlled breakaway stickers that tell on anyone who tries to peel or move them.
Most of these labels are engineered to leave a void pattern or scattered residue on the surface when disturbed. So even if somebody tries to stick it back down, you’ll see the marks underneath during inspection.
Typical attributes:
- Void pattern: When lifted, the label splits, leaving “VOID” text or a checkerboard pattern on either the label, the surface, or both. Once that pattern is exposed, the label can’t be returned to its original state.
- Adhesive strength: Uses a permanent adhesive tuned for metal or plastic surfaces commonly found in vehicle cabins and engine bays.
- Temperature range: Often rated for automotive conditions, for example -20°C to +80°C or higher, so they don’t fall off in winter or soften in summer.
- Cost per seal: Still fairly low, but a bit higher than basic wire due to specialist adhesives, printing, and sometimes holograms or QR codes.
- Regulatory acceptance: Generally accepted in most jurisdictions, especially when they’re used in combination with wire seals on critical points.
In real work, adhesive seals are handy as:
- Enclosure seals placed across housing joints or access panels so you can spot any opening or cover movement.
- Connector seals laid across plug faces to show if a harness has been unplugged or swapped.
- Calibration seals applied by certified technicians after they’ve finished setting the speed governor, marking the exact screws or ports that were touched.
Be picky with these labels. If you use cheap office stickers, they peel off with heat and vibration, which looks like tampering and wastes time during inspections. You want proper automotive-grade adhesive tamper-evident seals that are made for life on a moving vehicle.
Electronic Tamper Detection
Electronic tamper detection modules add brains to the whole setup. Instead of waiting for someone to physically look at seals, the speed limiter or connected hardware monitors itself and reports when something suspicious happens.
This doesn’t replace physical seals, and regulators rarely accept electronics alone. But for fleets running telematics, it’s a strong upgrade that spots tampering early and logs reliable data in the background.
Key attributes of electronic tamper detection:
- Detection method: Usually a small enclosure-open switch, a magnetic sensor, or CAN heartbeat monitoring that notices when the governor or its wiring suddenly goes quiet or behaves abnormally.
- Alert latency: From a few seconds to a couple of minutes, depending on how often the telematics unit checks in. That’s fast enough to know about tampering long before the truck returns to base.
- False positive rate: Generally low if installed and tuned correctly, though harsh vibration, poor mounting, or over-sensitive triggers can generate occasional noise that needs investigation.
- Fleet dashboard integration: Tamper events appear in your fleet dashboard or telematics portal as a seal break alert or “tamper” flag, often with extra context like time and location.
- Cost per unit: Higher than a piece of wire, of course, but spread over the life of the vehicle, it’s usually small compared to the cost of one serious tampering incident.
Think of electronic detection as a tamper detection speed governor enhancer. Physical seals give you that visual proof inspectors want. The electronics give fleet managers real-time visibility and a tamper history you can export as evidence.
For more complex setups with smart alerting and integration into your broader telematics or incident workflow, make sure your provider explains exactly how tamper events are logged, escalated, and stored for the long term.
Key Technical Attributes of Tamper-Proof Seals and Procedures

There are a lot of moving parts in a solid tamper strategy, from the wire itself to how your office files the paperwork. The table below breaks out the main entities involved in speed governor tamper protection and the attributes you should pay attention to for compliance and day-to-day operations.
| Entity | Key Attributes | Typical Values / Notes |
|---|---|---|
| Wire tamper seal | Material | Steel or high-tensile plastic wire |
| Wire tamper seal | Break evidence | Visible cut, frayed, stretched or removed wire |
| Wire tamper seal | Serial number | Unique, laser-etched or stamped ID |
| Wire tamper seal | Cost per seal | Low, typically cents in USD |
| Wire tamper seal | Regulatory acceptance | Universal across inspection authorities |
| Adhesive tamper-evident seal | Void pattern | “VOID” text or patterned residue on removal |
| Adhesive tamper-evident seal | Adhesive strength | Permanent, surface-specific formulations |
| Adhesive tamper-evident seal | Temperature range | Automotive-grade, e.g. -20°C to +80°C |
| Adhesive tamper-evident seal | Cost per seal | Low–medium, depending on print and size |
| Adhesive tamper-evident seal | Regulatory acceptance | Most jurisdictions, especially with wire |
| Electronic tamper detection | Detection method | Enclosure switch, magnetic sensor, or CAN heartbeat |
| Electronic tamper detection | Alert latency | Seconds to a few minutes |
| Electronic tamper detection | False positive rate | Low, but depends on installation and tuning |
| Electronic tamper detection | Fleet dashboard integration | Yes, via telematics / cloud dashboard |
| Electronic tamper detection | Cost per unit | Higher than physical seals, per device |
| Seal inspection procedure | Frequency | At every calibration and scheduled audit |
| Seal inspection procedure | Serial number verification | Checked against calibration certificate or log |
| Seal inspection procedure | Photograph requirement | Yes, photos stored as part of audit trail |
| Seal inspection procedure | Inspector qualification | Certified technician or regulatory inspector |
| Seal inspection procedure | Documentation | Recorded in fleet compliance seal audit |
| Broken seal consequences | Regulatory fine | Varies by jurisdiction; often substantial per vehicle |
| Broken seal consequences | Mandatory recalibration | Yes, before returning vehicle to service |
| Broken seal consequences | Vehicle off-road | Required until resealed and documented |
| Broken seal consequences | Investigation requirement | Yes, internal and sometimes regulatory |
| Broken seal consequences | Insurance impact | Can trigger coverage questions or disputes |
How to Inspect Seals During Fleet Audits
A good tamper-proof speed limiter program lives or dies on inspection. You can install the best kit in the world, but if nobody checks it properly, you’re running blind. The upside is that a solid speed governor seal inspection routine only takes a few minutes per vehicle once your team knows the drill.
In practice, that routine means verifying seal serial numbers against your paperwork, checking wire seals for any signs of cutting or stretching, looking closely at adhesive labels for void patterns or lifting, reviewing electronic tamper logs in your telematics system, and taking clear photos of every seal to slot into your audit trail.
Step 1: Prepare Documentation and Tools
Before you walk out to the yard, get your paperwork and tools straight. That saves you walking back and forth and keeps your audit defensible.
You’ll want:
- The latest calibration certificate and matching seal certificate or digital record for that vehicle’s speed governor.
- An up-to-date list or database showing the expected seal serial numbers for each unit and each seal point.
- A smartphone or camera ready to take clear tamper evidence photographs, including close-ups of serial numbers.
- Access to your telematics platform or fleet dashboard if you run an electronic tamper detection module on the vehicle.
Doing this upfront means your fleet compliance seal audit has fewer gaps. If a regulator ever asks why a serial doesn’t match, you’ll have a clean trail to fall back on.
Step 2: Locate All Sealed Points
One area that trips people up is missing seal locations. They check the main unit, forget a connector, and then an inspector spots it later. So map it properly.
Identify every location that should have a seal, often including:
- The main speed governor enclosure seal across the housing or access cover.
- Any connector seals on the wiring harness that feeds or bypasses the governor.
- Adhesive calibration seals placed across adjustment screws, access panels, USB or diagnostic/service ports.
Use install diagrams, OEM manuals, or photos from previous inspections to confirm you’ve hit every point. Many fleets keep a standard “seal map” for each vehicle type so new technicians know exactly what to look for.
Step 3: Verify Wire Seal Integrity
Wire seals tell a lot if you look closely. Someone who has tried to be “clever” and re-crimp a cut seal often leaves tiny signs that only show up when you take a proper look instead of just glancing from a distance.
For each wire seal:
- Confirm the wire is intact with no cuts, crushed strands, fraying, or unnatural kinks that suggest it has been forced or re-threaded.
- Check the seal body is undamaged, firmly crimped, and not showing pry marks or tool damage.
- Read the serial number on the seal body and compare it against the listed serial on the calibration or seal certificate.
If the number doesn’t match, the seal looks fresh with no record, or you see any mechanical tampering, log it immediately as a potential speed governor manipulation prevention failure. That’s not something to “keep an eye on later”. It needs escalation and usually a recalibration appointment.
Step 4: Inspect Adhesive Tamper-Evident Labels
Adhesive seals can be subtle. The damage isn’t always obvious from a metre away. Take your time and give them a close inspection under good light.
For every adhesive seal:
- Look for edges lifting, corners curling, bubbles, or any partial tears through the label.
- Check carefully for exposed void pattern text or residue underneath, which means the label has been peeled or shifted at least once.
- Make sure any printed info, QR code, or serial text is still legible and hasn’t been scraped or worn away.
Labels that have been removed and stuck back down rarely sit perfectly. You might see misalignment, different material, or disturbed glue underneath. Treat any odd-looking label as a suspected tamper event, not just “wear and tear”, and record it that way.
Step 5: Review Electronic Tamper Logs
If you’re running an electronic tamper detection module, don’t ignore what it’s telling you. I’ve seen fleets shrug off repeated alerts until a serious incident made those logs very interesting to an investigator.
Here’s the drill:
- Open your telematics portal or the back-office system that handles the speed limiter data.
- Scan for any tamper flags, seal break alerts, or entries such as “enclosure opened”, “power removed”, or “CAN loss”.
- Match the timestamps of those events against workshop job cards, calibration visits, and inspection records to see which are legitimate and which need explaining.
This is where your failure logging tamper evidence process ties everything together. Every tamper event should have a matching maintenance or inspection record, or it becomes a red flag that needs a deeper look.
Step 6: Document and Photograph Everything
Good documentation is what turns an ordinary check into a defensible audit. If something goes wrong months later, you won’t remember the details unless you’ve captured them now.
For each vehicle, build a clear record that includes:
- Tamper evidence photographs of every seal in place, close enough to show both the condition and the serial number.
- A simple checklist outcome (pass/fail) for each seal point you inspected.
- Notes on any discrepancies, missing seals, suspected tampering, or oddities in the electronic tamper log.
Store all this in your central audit trail, whether that’s a digital fleet system or a structured file setup. In a serious investigation, that history often carries as much weight as the physical seals themselves.
Step 7: Escalate Issues and Arrange Resealing
If something doesn’t look right, you deal with it straight away. Hoping it goes away just digs you a deeper hole if an accident or stop-check happens in the meantime.
Where any seal is broken, missing, or mismatched against records:
- Immediately flag that vehicle as non-compliant and restrict it from going back into service until cleared.
- Book it in with a certified technician or authorised workshop to inspect the governor, check wiring, recalibrate if needed, and reseal properly.
- Make sure the replacement requires new seal serials to be logged, fresh photos captured, and a new calibration certificate issued and linked to those seals.
Regulatory inspection authorities tend to look more favorably on fleets that respond quickly and document everything than on fleets that argue or delay. A prompt, structured reaction often helps keep penalties contained if there is a broader inspection.
What Happens When a Seal Is Broken (Regulatory and Insurance Consequences)
A broken seal is treated as a big deal. From an enforcement or insurance point of view, a damaged or missing seal usually equals tampering until you can build a strong case that it was innocent and handled correctly.
From a regulator’s perspective, a broken speed governor tamper seal means three things straight away:
- The device might have been opened, bypassed, or altered.
- The current calibration is unknown and can’t be trusted.
- Any existing calibration certificate is now effectively void.
Regulatory Enforcement and Fines
Most jurisdictions give the inspection authority power to write fines and even pull plates for vehicles where they find:
- Missing, broken, or clearly tampered tamper-proof seals on a governor that should be sealed.
- Seal serial numbers that don’t match your calibration or seal records.
- Electronic tamper logs showing events that were never reported or addressed.
The size of the regulatory fine in USD varies from a slap on the wrist to serious money, especially if an entire fleet shows similar issues. Once they decide tampering is systematic rather than accidental, they tend to go hard.
Mandatory Recalibration and Resealing
A broken seal almost always drags a full technical process behind it. Expect to be asked for evidence it was rectified before the vehicle went back on the road.
That process usually includes:
- Full inspection of the speed governor housing, connectors, and any potential bypass wiring.
- Recalibration of the governor to the mandated maximum speed, following the official procedure.
- Issue of a fresh calibration certificate seal and matching paperwork, with the new date, technician ID, and serial numbers fully logged.
Until all of that is done, regulators will treat the vehicle as off-road from a compliance standpoint, even if it’s technically driveable.
Vehicle Downtime and Operational Impact
Every day a truck sits waiting for recalibration and resealing costs you money. Many fleets focus on the fine and forget how much they lose in missed work.
Typical impacts include:
- Lost utilisation and revenue from that vehicle’s scheduled runs.
- Last-minute rescheduling of loads, drivers, or routes, which can hurt customer service.
- Extra workshop time, technician labour, and possible towing if the vehicle can’t legally be driven to a calibration facility.
Compared with that, the cost of quality seals and a disciplined inspection program is tiny. That’s why serious operators treat seal management as preventative maintenance, not just paperwork.
Insurance and Liability Exposure
Insurers are getting much sharper about speed governor manipulation prevention. If you have an incident and the investigation uncovers a broken or missing seal, you can expect some tough questions.
Depending on policy wording and local law, insurers may:
- Question whether the speed limiter was working as specified at the time of the crash.
- Reduce or deny coverage if your policy requires working safety equipment and you can’t prove it was compliant.
- Seek to recover costs from your company on the basis that poor procedures or negligence contributed to the loss.
A tight seal audit trail with photos, serials, dates, and technician records is one of your strongest defenses. It shows you took the system seriously and did your part, even if something failed later.
Internal Investigation Requirements
Any broken seal deserves an internal look, even if regulators never hear about it. You want to know whether you’re dealing with a one-off mistake or a pattern.
Your investigation should cover:
- Who had access to the vehicle and the governor since the last verified inspection.
- Whether the seal might have been broken during legitimate work that was never documented or signed off.
- Whether other vehicles, drivers, or workshops show similar signs of unrecorded access or a culture of tampering.
Best practice is to bake this straight into your fleet policy. Make it crystal clear to drivers and technicians that tampering with a seal is a serious offence and that every seal change follows a strict chain of custody procedure.
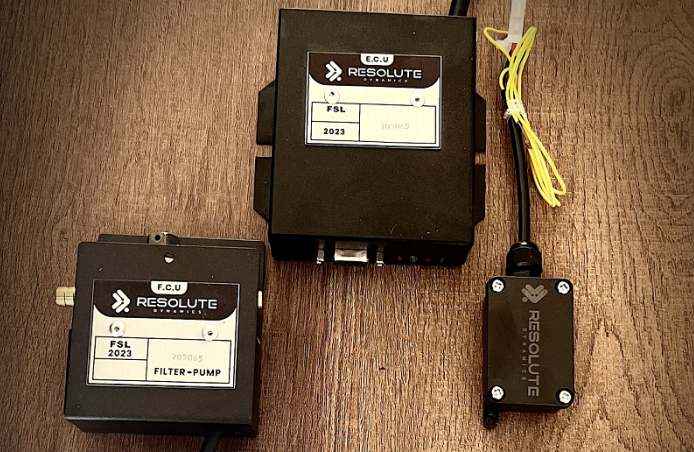
How Resolute Dynamics Combines Physical and Electronic Tamper Protection
Some fleets are happy just meeting the minimum. Others want to get ahead of the problem and know about tampering before it shows up in an accident report. That’s where layered systems like the Resolute setup come into their own.
The Resolute Dynamics tamper system is a good example of modern speed governor manipulation prevention done properly. It uses the physical seals that regulators expect, then backs them up with electronics and logging that fleet managers appreciate when something goes wrong.
Layer 1: Physical Wire and Adhesive Seals
Resolute Dynamics doesn’t skip the basics. Their hardware ships with traditional sealing points the same way inspectors are used to seeing them in the field.
Units are fitted with:
- Wire tamper seals threaded through the main enclosure and any key connectors that could be used to bypass or unplug the governor.
- Adhesive tamper-evident labels across housing joints, adjustment screws, and service ports, giving extra enclosure seals that show even minor attempts to gain access.
Those physical seals line up with standard regulatory seal requirements. So if a roadside inspector opens the compartment, they see familiar wire and label seals with serial numbers to check, not some experimental setup they don’t recognise.
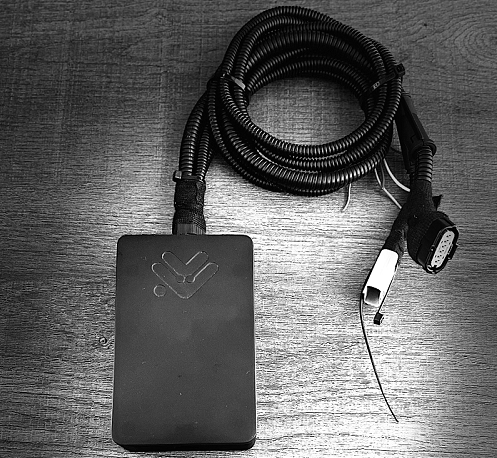
Layer 2: Electronic Enclosure-Open Detection
Inside the unit sits an electronic tamper detection module watching for any opening or disconnection. You can think of it like a little alarm system focused just on the governor.
When tampering is detected, the module:
- Logs a tamper event in local memory with a precise timestamp.
- Sends the event over CAN or via a telematics link to the back office in the next data burst.
- Triggers a visible seal break alert on the fleet dashboard so managers and controllers can see it without digging through logs.
This way, you’re not relying on a six-month inspection cycle to notice a cut seal. You get a near real-time heads-up and can investigate before the vehicle racks up thousands of kilometres in a questionable state.
Layer 3: Context-Rich Tamper Logging
Raw tamper alerts are useful, but on their own they don’t tell you who, where, or why. Resolute’s approach is to tie those events to as much context as possible so they have real evidential weight.
The system links tamper events with:
- GPS location at the moment the enclosure was opened or the device was disconnected.
- Driver ID or shift information when integrated with driver login or card systems, so you know who was in charge of the vehicle.
- Key vehicle details, such as whether it was moving, parked, or had ignition on or off when the event occurred.
That context turns a generic “tamper flag” into usable forensic evidence. You can separate a legitimate workshop job in your own yard from a suspicious opening in an unapproved location halfway across the country.
Layer 4: Chain of Custody and Audit Trail
Resolute Dynamics setups are usually deployed as part of a broader compliance process, not just dropped in and forgotten. The idea is to give you a clean fleet compliance seal audit history from day one.
When a technician opens and reseals a governor, the typical workflow is:
- The event is recorded in the system with technician ID, reason for access, and time/date.
- Fresh physical seals with new serial numbers are fitted, replacing any that were removed or damaged.
- Digital records and photographs of the new seals are attached to that vehicle’s history so you can show a continuous trail of custody.
This digital chain of custody seal, from first installation through every calibration and reseal, makes it far easier to reassure regulators and insurers that you’ve done everything reasonably expected to keep tampering under control.
For the procedural side of calibration itself, check your official calibration guide and make sure your workshop workflow covers every step before you apply the final seal.
Common Tamper-Proof Seal Mistakes (and How to Fix Them)
Even good fleets shoot themselves in the foot with small mistakes around speed limiter anti-tamper processes. Most of these are fixable with clearer rules and a bit of training, but you have to spot them first.
Mistake 1: Treating Seals as “Stickers” Instead of Legal Evidence
Problem: Drivers and some workshop staff see seals as disposable. They cut them to make access easier, then carry on without logging it or getting a technician involved. On paper, the truck still looks compliant. On the road, it isn’t.
Fix: Update your policies and toolbox talks to make it clear that seals are legal evidence, not decorations. Cutting a seal is a reportable event. Require formal sign-off, documentation, and involvement of a certified technician every single time a seal is broken, even for legitimate work.
Mistake 2: Not Recording Seal Serial Numbers Properly
Problem: Seals go on the vehicle, but the seal certificate or fleet record never gets updated. Months later, nobody can prove that a given serial belongs to that truck and that calibration event.
Fix: Make it mandatory for technicians to record each seal serial number at installation and calibration in a central digital system, not on scrap paper. Back it up with a quick photo of each seal on the unit so your audit trail links the number, the vehicle, and the actual physical seal.
Mistake 3: Skipping Photographs During Inspections
Problem: Inspectors tick “OK” on a form and move on without taking tamper evidence photographs. That looks fine until an accident happens six months later and there’s nothing concrete to show the seals were intact at the last audit.
Fix: Build photos into your process. Every inspection should include clear, date-stamped images of each seal point. Integrate photo capture into your fleet compliance platform or checklist app so it becomes part of the workflow, not an optional extra.
Mistake 4: Using Inappropriate Adhesive Seals
Problem: Someone buys cheap labels that weren’t made for high temperatures, oils, or plastic housings. They curl, fall off, or degrade, which looks exactly like tampering and wastes everyone’s time.
Fix: Standardise on tested, automotive-grade adhesive tamper-evident seals that match your vehicle surfaces and temperature range. Document which product should be used where, and don’t let technicians mix in off-brand labels from the stationery cupboard.
Mistake 5: Ignoring Electronic Tamper Alerts
Problem: Fleets pay for electronic tamper detection but don’t wire the alerts into any real process. Messages show up on dashboards and get ignored, sometimes for months.
Fix: Treat every tamper alert like a safety incident. Integrate the notifications into your incident management flow so each event triggers a documented physical check, investigation, and, if needed, recalibration and resealing. That way your electronic system actually improves speed governor manipulation prevention instead of just adding noise.
Mistake 6: Mixing Calibration and Tamper Content in One Process
Problem: Workshops treat calibration, diagnostics, and sealing as one vague “tune-up”. Steps get missed, records are incomplete, and nobody can say for sure exactly what happened or when the final seal went on.
Fix: Split the workflow into clear stages. One checklist for calibration itself, one for failure logging and diagnostics, and a final one for seal application and documentation. Each stage should be recorded and signed off separately so it’s obvious who did what and in which order.
Whenever you replace a device, remember that any replacement requires new seal serials and updated paperwork. Treat a replacement unit like a fresh install, not a patch job.
Related: Post-installation audit checklist – Calibration & reset procedure – What is a speed governor?
FAQ: Tamper-Proof Seals on Speed Governors
1. Who is allowed to apply or remove speed governor seals?
In most regions, only certified technicians and authorised staff from regulatory inspection authorities are allowed to apply or remove seals. If a driver, unqualified mechanic, or depot staff member cuts a seal without that authority, it’s usually treated as tampering whether they changed settings or not.
2. How often should speed governor seals be inspected?
At the bare minimum, seals should be checked at every scheduled fleet audit and any time the vehicle comes in for work that touches the governor or its wiring. Many higher-risk operations also build a quick visual seal check into daily or pre-trip inspections so problems are caught early.
3. What does it cost to replace a tamper-proof seal?
The physical wire seal or adhesive label is cheap, usually just cents in USD. The real cost comes from the technician time to inspect and, if necessary, recalibrate, plus any vehicle downtime. If you cut corners on documentation and that later causes an insurance or regulatory dispute, the real bill can be much higher.
4. Are electronic tamper systems better than physical seals?
They’re different tools. Electronic systems aren’t a replacement for physical seals. Regulators still treat the physical seal as the primary evidence, while electronic tamper detection works as a strong complement. It gives you fast alerts, better logs, and clearer proof of what happened and when.
5. What should I do if I get a false tamper alert?
Start at the vehicle. Check every physical seal visually. If everything is intact and matches your records, look at the installation of the electronic sensors and how sensitive they’re set. Adjust if needed. Whatever you do, record the alert and your findings in your audit trail so you can show it was investigated and resolved properly.
6. What happens if a seal breaks accidentally during legitimate maintenance?
Treat it as you would any tamper event, just with a known cause. Document it immediately with photos, staff names, and the reason for access. Then bring in a certified technician to confirm calibration, apply a new seal, and issue an updated calibration certificate seal. Your records should make it crystal clear why the original seal was removed.
7. Do all jurisdictions require tamper-proof seals on speed limiters?
No, but most areas that mandate speed governors also require some form of physical tamper evidence. The details differ, so you should always check your local rules. As a rule of thumb, following the strictest standard that applies to your routes keeps you out of trouble as regulations evolve.
8. Can a driver be held personally responsible for a broken seal?
Yes. If a chain of custody seal process shows the driver had unexplained access and tampering is suspected, they can face disciplinary action or even legal consequences, depending on the region. Clear policies, proper training, and fair investigations help ensure drivers are treated reasonably while still protecting the fleet.
Final Summary: Make Seals Central to Your Speed Governor Compliance
Tamper-proof seals on speed governors are small parts with big consequences. Get them right and they quietly keep your fleet safe, compliant, and defensible. Get them wrong and they can open the door to fines, downtime, and ugly arguments with regulators and insurers.
Used properly, seals:
- Deter anyone tempted to bypass or “tweak” speed limits on their own.
- Give regulators and insurers trusted physical and digital evidence to work with.
- Cut legal and financial risk if something goes wrong on the road.
- Keep your operation aligned with evolving speed limiter anti-tamper expectations across different regions.
Build seals into your standard procedures, not as an afterthought. Link every governor calibration to a specific, recorded seal. Carry out regular, documented speed governor seal inspections. Treat any broken, missing, or suspicious seal as a top-priority safety and compliance issue, not a cosmetic problem.
From there, look at how you apply seal after calibration in your workshop workflow and confirm that every new seal on replacement unit is fully documented. If you lock that down, you’ll have a tamper strategy that stands up to roadside checks, investigations, and real-world use.

The Resolute Dynamics team designs and manufactures speed limiters (SLD), GPS tracking, and automotive safety systems used on 200,000+ vehicles across 20+ countries. We write about fleet compliance, road-safety regulation, and vehicle-safety technology, including Malaysia’s JPJ SLD mandate, UAE RTA rules, and global standards like UN R89, to help fleet operators and transport businesses stay safe and compliant.