TL;DR: Swapping a bad speed governor is not just unplug-old / plug-new. You have to match CAN protocol version, ECU interface type, mounting and connectors, and regional regulatory certification. Then you migrate the configuration safely, confirm ECU integration, and road test the vehicle. Watch closely for ECU interference after replacement — that is the most common failure mode in the first 100 km.
Skip any of that and you risk fault codes, non-compliance, or a truck that doesn’t control speed the way you think it does.
Key Takeaways
- Chronic failures, obsolete firmware, physical damage, decertification, or a repair quote over roughly 60% of the cost of a new unit are strong signs you should replace the speed governor, not keep patching it.
- True compatibility comes down to five non-negotiables: CAN protocol, ECU interface method, mounting pattern, wiring harness/connector, and the correct regulatory certification for your country or state.
- A solid replacement process always follows the same path: configuration backup, safe decommissioning, physical installation, parameter migration, verification drive, and new tamper-proof seals with documentation.
- Pre-swap ECU checks for CAN IDs, existing DTCs, and cruise control integration help you avoid CAN bus conflicts and unexpected behavior with other safety systems.
- Standardizing a fleet on one speed governor model cuts downtime, reduces training time, trims spare inventory, and makes firmware updates and compliance reporting far simpler.
- Careful configuration migration from old to new protects your existing speed limits, thresholds, and driver behavior rules so the truck feels the same to the driver after the swap.
- Fresh tamper-proof seals and proper paperwork after the job protect your regulatory status, warranty position, and audit trail. Our tamper seals explained guide covers seal types, application, and inspection rules in detail.
- Programs like the Resolute Dynamics replacement program help fleets lock in a standard model, provide clear compatibility matrices, and handle staged rollouts to keep trucks on the road.
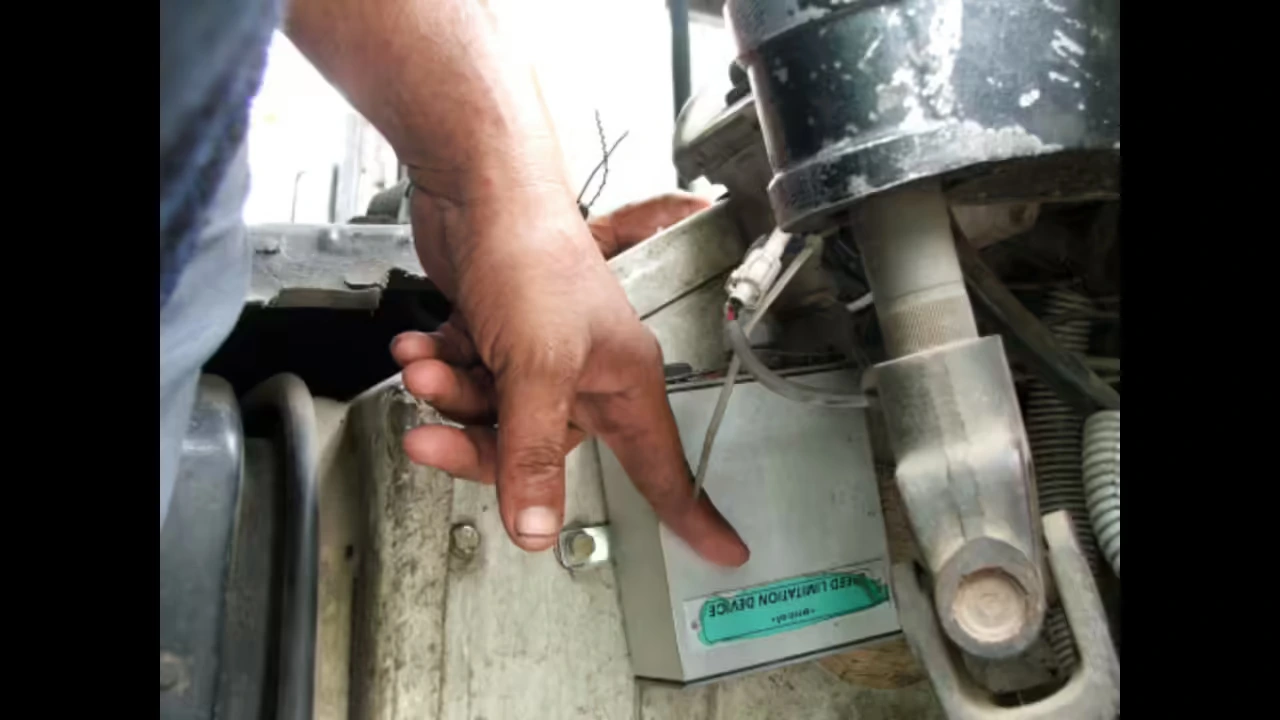
What Is a Speed Governor Replacement?
A speed governor replacement means removing a faulty, unstable, or obsolete speed limiter and installing a new, compatible unit that can legally and safely control the vehicle’s top speed.
In practice this involves matching CAN protocol and ECU interfaces, transferring or rebuilding configuration, applying new tamper-proof seals, and proving that the vehicle still meets all applicable speed limiting regulations after the change.
Signs Your Speed Governor Needs Replacement (Not Just Repair)
You don’t jump straight to replacement every time a governor misbehaves. But there’s a point where keeping an old unit alive is just throwing good money after bad. Replacement starts to make more sense when you’ve got repeated failures after repair, no firmware upgrade path, obvious physical damage, regulatory decertification, or a repair estimate that’s creeping past about 60% of the price of a new unit.
Before you condemn the governor, rule out basics. A lot of “governor problems” turn out to be broken wiring, bad vehicle speed sensors, poor grounds, or misused diagnostic tools. Use a structured diagnostic flow and verify that the fault stays with the governor itself, not the harness or sensors. Once you’re confident the governor really is the weak link, look for these replacement triggers:
- Repeated failures after repair
- The same DTCs or drive symptoms keep returning a few days or weeks after each repair attempt.
- Internal pieces like relays, power stages, or CAN transceivers keep failing, which usually means the electronics are at end-of-life from age, heat, or vibration.
- Your shop is spending more time pulling the same truck back in for “one more fix” than keeping it in service.
- Obsolete firmware with no update path
- The manufacturer has dropped support, told you the unit is “legacy,” or pulled firmware files from their portal.
- There are no firmware patches available to comply with newer rules, like lower maximum legal speeds, mandatory logging, or security hardening.
- Your current fleet tools or service laptop can’t talk to the governor anymore, so you’re unable to change configuration or calibrate properly.
- Physical damage to housing or connectors
- The casing is cracked, corroded, or swollen, which invites moisture, dirt, and vibration to finish the job.
- Mounting tabs are broken or missing, so the unit hangs on the harness or vibrates excessively.
- Connector pins are loose, bent, green with corrosion, or show burn marks from arcing or overload.
- Regulatory decertification of the model
- Your governor no longer carries a valid regulatory certification mark for your jurisdiction due to standard revisions, recalls, or policy changes.
- Inspection stations or compliance audits start flagging the model as non-compliant even if it “works fine” from a driver’s perspective.
- New rules demand features like tamper-resistant logging, secure access, or encryption that the existing unit physically can’t support.
- Cost-of-repair exceeds 60% of replacement
- By the time you add up parts and labor, the repair quote is more than about 60% of a new speed governor replacement unit.
- At that threshold, it usually makes more business sense to move to a current, supportable model instead of squeezing one more year out of old hardware.
- Once you include downtime, call-backs, and risk of repeat failure, replacement usually wins over a 12–24 month window.
If management needs hard numbers, plug recent failures into a downtime calculator and include technician time, tow bills, and missed loads. Seeing that total on paper often pushes the decision toward replacement.
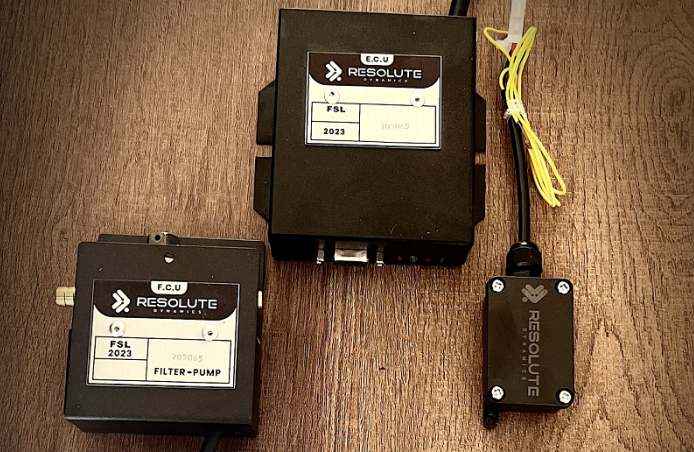
Speed Governor Compatibility Checklist (5 Must-Match Factors)
A lot of trouble starts when someone orders a speed governor just because “the plugs look the same” or “the bracket lines up.” Proper speed governor replacement lives or dies on five compatibility points: CAN protocol, ECU interface method, physical mounting, wiring harness, and regulatory certification.
Miss one and you can end up with a non-communicating brick, constant fault codes, or a unit that a roadside inspector can fail on the spot.
The speed governor compatibility chart below gives a quick view of what you should confirm before you order anything.
| Compatibility Attribute | What to Check | Typical Values |
|---|---|---|
| CAN protocol (version) | Bus standard and baud rate | SAE J1939, ISO 11898-2, 250 kbps / 500 kbps |
| ECU interface | How governor enforces limit | Throttle-by-wire, fuel injection control, torque request |
| Mounting bolt pattern | Hole spacing, orientation | Dimensions in mm/inches, bracket requirements |
| Connector type | Shape, keying, pin count | 18-pin, 24-pin, sealed automotive standards |
| Certification mark | Legal approval | Regional mark/number for your jurisdiction |
That table is just the starting point. Here’s how you translate each line into real-world checks in the bay.
1. CAN Protocol Match
CAN protocol compatibility is the one item you never compromise on. If the governor can’t talk the same language as the ECU and the rest of the network, the truck either throws a forest of codes or quietly ignores the limiter. Both outcomes are bad.
Focus on these areas:
- CAN standard and version
- Identify what the vehicle uses: SAE J1939, ISO 15765, or a proprietary mix the OEM layered on top. Heavy trucks are usually J1939, but don’t assume.
- Confirm that your new governor’s spec sheet clearly lists support for that same protocol and, if relevant, the right version or variant.
- Baud rate and physical layer
- Most commercial vehicles are running 250 kbps or 500 kbps on twisted-pair CAN wired to ISO 11898-2 standards.
- Your replacement governor has to support the exact baud rate and physical layer. If you mismatch this, you’ll see communication errors or a silent device on the bus.
- CAN message IDs and PGNs
- Look at which PGNs or message IDs are used for speed request, torque limit, and status reporting in your current setup.
- Use the supplier’s replacement compatibility matrix to confirm their unit can act on or broadcast those same messages correctly.
- Check for any IDs the governor wants to use that might already belong to ABS, transmission, or body controllers so you don’t create message conflicts.
On bigger fleets, I like to bench-test the new governor with an ECU handshake verification harness before it ever touches a revenue vehicle. You catch protocol issues in the shop instead of on the highway.
2. ECU Interface Method
The ECU integration interface is how the governor actually enforces the limit. This is where people often get into trouble by assuming “a limiter is a limiter.” It is not. Different powertrains expect different types of requests or overrides, and the governor has to speak that same style.
- Throttle control
- Here the governor monitors speed and then caps the throttle-by-wire signal so the engine never gets more than a set percentage.
- This works on ECUs that are designed to accept an external throttle override, but some modern torque-based ECUs are not happy with direct pedal interference.
- Fuel injection or torque request
- On newer engines, the governor sends a torque or fuel limit over CAN rather than messing with the pedal signal.
- This is standard on many J1939-based systems where the ECU manages torque and power based on multiple inputs.
- Hybrid methods
- Some setups mix CAN-based requests with hard-wired enable lines or cut-outs for redundancy or legal reasons.
- In that case you need to match wiring and behavior function-by-function using the official diagrams. Guessing here is a safety risk.
Select a compatible speed governor that supports the same interface method your ECU expects. If the connector fits but the interface style is different, you could end up with no limiting, harsh cut-outs, or conflicts with built-in vehicle speed limiters.
Use a wiring harness adapter approved by the governor manufacturer instead of homemade splices, especially on torque request or throttle lines.
3. Physical Mounting
Physical mounting dimensions might sound like a minor detail, but they have a big impact on lifespan and reliability. I see a lot of premature failures caused by units bolted to thin sheet metal, tied to wiring bundles, or living right next to hot exhaust components.
- Mounting bolt pattern
- Measure the center-to-center distance of mounting holes on the old bracket or the chassis location. Do it in mm or inches, but be consistent.
- Compare those numbers to the replacement’s mechanical drawing and make sure the mounting bolt pattern matches or that an adapter bracket is available.
- Governor mounting bracket
- Some replacement units are shorter, taller, or have different weight distribution. They’re designed to sit on a specific bracket to absorb vibration and orient cooling fins properly.
- Use the OEM or supplier’s governor mounting bracket kit, not whatever angle iron is lying around. You’re paying for engineering, you might as well use it.
- Environmental location
- Check the unit’s IP rating. Under-dash units don’t like life in the engine bay, and engine-rated units are often overkill inside the cab.
- Follow the maker’s guidance on distance from hot surfaces, exhaust components, and moving parts. Heat and vibration kill electronics faster than anything.
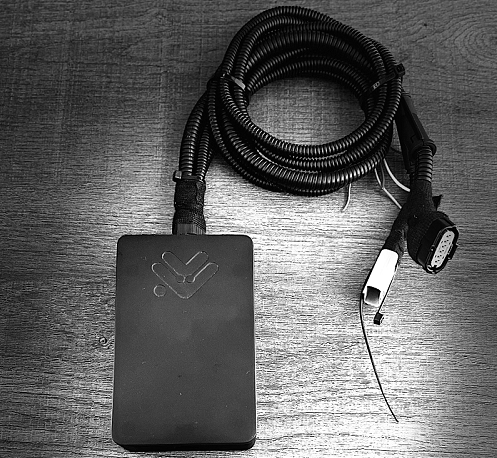
4. Wiring Harness and Connector
A mismatched wiring harness connector is one of the fastest ways to turn a simple job into a week-long headache. I’ve seen pins forced, housings cracked, and “temporary” splices that cause ghost faults for months.
- Connector type and pin count
- Identify the connector family, pin count, and layout on the existing governor. An 18-pin sealed automotive connector is not the same as every other 18-pin unit on the market.
- Make sure keying, latch style, and orientation match so the harness can’t be connected in the wrong position.
- Wire mapping
- Pin functions matter more than colors. Verify each pin’s role: power, ground, CAN High and Low, ignition feed, I/O lines, and any hard-wired safety or enable circuits.
- Use the new governor’s wiring diagram from its manual, not “it looks the same as the old one.” That assumption is how ECUs get smoked.
- Harness adapters
- If the pinout or connector changes, use an official adapter or replacement harness kit designed for that exact retrofit.
- Only cut and splice when the installation guide explicitly instructs you and you can document the change for future troubleshooting.
5. Regulatory Certification
A governor that works perfectly from an engineering standpoint can still land you in trouble if it lacks the right regulatory certification mark for your region. Inspectors and auditors look for specific symbols and approval numbers, and they don’t care how nicely the truck drives.
- Certification equivalence
- Confirm that the new model’s approval is recognized as an acceptable equivalent or superior to your existing one under local law.
- Review regional rules for speed limiters on both commercial and passenger vehicles, as requirements can differ even within the same country.
- Regulatory approval replacement
- Some jurisdictions expect you to report a model change or present the vehicle for re-inspection after a speed governor replacement.
- Keep a copy of the governor’s certificate or E-mark in your compliance file for each vehicle so any audit or roadside check is quick to resolve.
- Tamper-proof seal requirements
- Many regulators insist that any governor intervention ends with a new tamper-proof seal and often a seal certificate or log entry.
- If you need to dive into the details of seal rules and inspection expectations, see the referenced tamper seal overview from your compliance resources.
Step-by-Step Replacement Process
A clean governor swap follows a predictable sequence. Skip steps and you usually pay for it in rework, downtime, or compliance headaches. At a high level you back up the configuration, decommission the old unit, install and wire the new one, migrate or rebuild the parameters, verify the behavior with a proper road test, then seal and document everything.
The process below forms a practical speed limiter replacement guide that most fleets can adapt into their standard operating procedure. It assumes you already confirmed compatibility using the checklist above.
1. Backup & Decommission
This first phase is all about preserving existing settings and making sure the old governor is taken out of service in a way you can defend in an audit.
Configuration backup
- Parameters transferred should include:
- All maximum speed setpoint(s) for different modes, regions, or trailer configurations.
- Speed thresholds that trigger warnings, derates, or hard cut-outs.
- Vehicle-specific calibration values such as wheel circumference, axle ratio, and any pulse scaling.
- Driver behavior rules like overspeed tolerance, grace periods, and escalation logic.
- Backup method
- Use USB export through the service port if the unit supports it and save the file with the VIN in the name.
- If your fleet uses telematics, leverage OTA backup so configuration is stored centrally before you touch anything.
- Where digital tools aren’t available, document settings manually, take clear screenshots, or record photos of each configuration screen.
Decommission procedure
- Shut the vehicle down and wait for the CAN bus to go to sleep. Many modern trucks need a few minutes with doors closed and key off.
- If the installation manual calls for it, disconnect the battery to avoid accidental shorts or brownouts while unplugging connectors.
- Carefully remove any existing tamper-proof seal and record that removal in your service notes with date, time, and reason.
- Unplug wiring harness connectors using the correct release tools so you don’t spread terminals or crack housings.
- Remove mounting bolts, take the old unit off the vehicle, and label it “decommissioned” or tag it with a red label so nobody reinstalls it by mistake.
Take a few photos of the original installation, the label, and the wiring before and after removal. Those images have saved more than one technician during a warranty debate or compliance audit, especially on larger fleets using programs like the Resolute Dynamics replacement program.
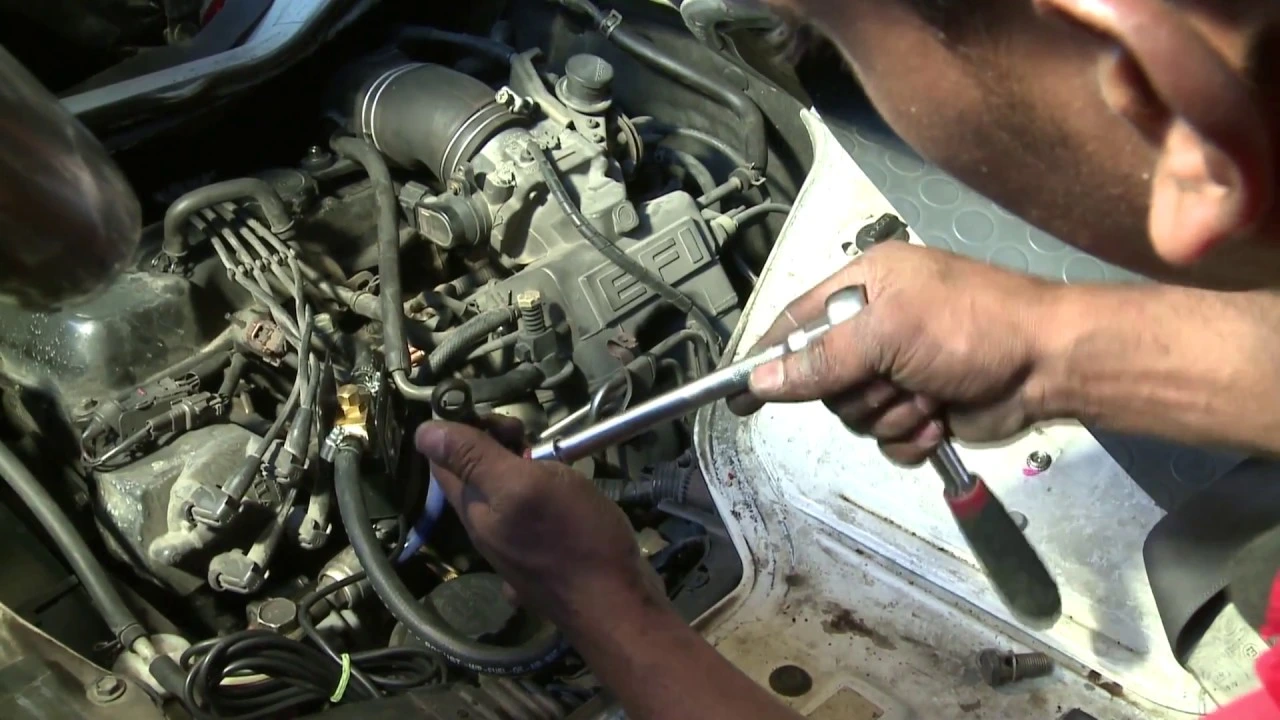
2. Install & Configure
Now you physically mount the new governor, connect it correctly, and get its configuration aligned with what the truck actually needs.
Physical installation
- Fit the recommended governor mounting bracket if the new unit’s bolt pattern or orientation differs from the old one.
- Secure the speed governor replacement unit using the specified bolt size and torque values so it can withstand vibration and impact loads.
- Route harnesses away from exhaust components, steering shafts, and sharp edges. Respect bend radius limits and use proper clips for strain relief.
Wiring and ECU integration
- Connect the wiring harness adapter or plug the existing harness into the new governor, making sure latches fully engage.
- Verify CAN High and Low are on the correct pins and that power and ignition feeds are present with a multimeter if there is any doubt.
- Cross-check ECU integration notes so you don’t leave an old speed limit function active and end up with fighting controllers or double limits.
Configuration restore / calibration transfer
- Restore method:
- If both governor models are from the same family, import the backed-up configuration via USB or OTA as recommended.
- Use any old-to-new parameter migration utility the manufacturer provides so scaling differences or new fields are handled correctly.
- Calibration transfer:
- When automatic migration completes, don’t trust it blindly. Go through each critical parameter and confirm values match your records.
- If the swap is across brands or very different generations, manually re-enter maximum speed, thresholds, wheel and axle data, and all behavior logic.
- Work down a detailed calibration after swap checklist so you don’t miss subtle items such as regional speed caps or mode-based limits.
3. Verify & Seal
This last phase proves the system behaves properly in the real world, then locks down your work so no one can quietly tamper with it later.
Post-replacement verification
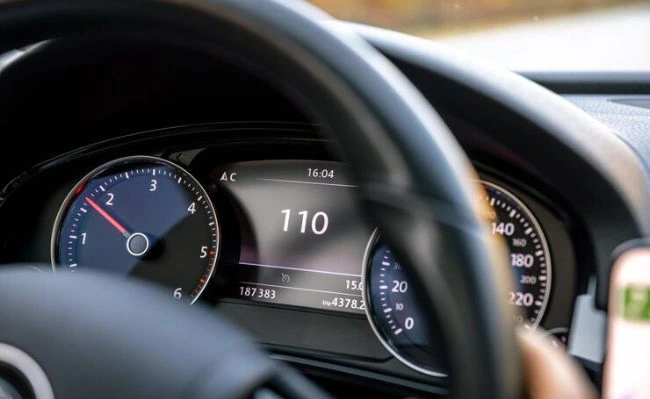
- Drive test duration: Plan for 20–30 minutes with a mix of low-speed maneuvers and steady highway driving where you can approach the governed limit safely.
- Speed range tested: Watch behavior from startup to normal cruising and then through the governed speed zone, both just below and slightly above setpoint within legal limits.
- DTC scan:
- Run a full diagnostic trouble code scan on all ECUs after the installation and before releasing the truck.
- Clear old codes, then repeat a short drive and re-scan to ensure nothing new pops up related to speed signals, torque limitation, or CAN communication.
- Cruise control test:
- Verify cruise control engages, holds speed, and cancels from brake, clutch (if manual), and switches as expected.
- Confirm cruise cannot override the speed governor and that governed behavior under cruise is smooth and predictable.
- Sign-off authority:
- A qualified technician or engineer should complete and sign the commissioning form for that vehicle.
- File the signed checklist with the unit’s records and, in a fleet environment, in the central asset system as well.
Tamper seal replacement
- Seal type:
- Use whatever your regulator or policy specifies: wire cable seals with crimped tags, destructible adhesive labels, or electronic seals that record opening events.
- Replacement requirement:
- After any speed governor replacement or setting change, assume new seals are mandatory. Inspections rely on clear tamper evidence to trust your configuration.
- Seal certificate:
- Record each seal’s serial number, the installer, and the date in a seal certificate or service record, and keep that linked to the vehicle’s VIN.
Once that’s done, update your fleet management system to show the new model and serial number, attach the commissioning checklist, and make a note for future audits. This paperwork also supports any post-installation audit of the speed limiter later on.
Step-by-Step Replacement Process (Summary How-To)
If you just need the high-level sequence for the workshop wall, here’s the process in a condensed, practical order:
- Confirm replacement is justified based on repeated faults, obsolete or decertified hardware, or repair quotes that are too close to new-unit pricing.
- Check compatibility for CAN protocol, ECU interface style, mounting pattern, harness/connector, and regulatory certification.
- Back up the current configuration via USB or OTA and record all key speed and calibration parameters.
- Power the vehicle down, let the CAN bus sleep, remove old seals, disconnect the harness, and remove the old unit as decommissioned.
- Install the new governor with any required mounting bracket and connect the harness or approved harness adapter.
- Restore or manually re-enter configuration, then carry out calibration transfer and review against your checklist.
- Run diagnostic scans, complete a proper drive cycle, and verify cruise control and limit behavior.
- Fit new tamper-proof seals and document seal IDs in your service records.
- Complete and sign the commissioning checklist for that vehicle.
- Update fleet databases and standardization records with the new governor model and serial number.
Avoiding ECU Conflicts with the New Governor
Most ECU issues after a swap come down to one of three things: CAN messages colliding, overlapping speed control logic, or sloppy integration settings. If you pay attention up front, you can avoid almost all of that drama.
Pre-swap ECU compatibility checks
- Verify the ECU’s supported CAN protocol, baud rate, and typical speed/torque messages from service documentation or OEM tools.
- Look for other aftermarket modules already on the bus, such as telematics systems, add-on cruise controls, or body controllers.
- Get the governor maker’s ECU integration guide so you know exactly which messages and signals the new unit expects to use.
CAN message ID conflict check
- Hook up a CAN analyzer or logger and capture traffic on the bus with the original setup active.
- Compare what you see with the new governor’s documentation so you can spot any overlapping PGNs or IDs before installation.
- Make sure IDs used by ABS, transmission, or body modules aren’t being reused by the governor, unless the design explicitly calls for it.
Post-swap DTC scan and tests
- Right after installation, run a full DTC scan on every ECU that can talk on that CAN network, not just the engine controller.
- Watch closely for codes involving speed signal plausibility, torque management, throttle command disagreements, or communication timeouts.
- Clear codes, run a short drive cycle, and scan again. You should not see new, persistent codes tied to speed limiting functions.
Cruise control integration
- Verify that cruise control still behaves as expected and that the governed speed logic doesn’t fight with cruise’s internal logic.
- Make sure there’s no path for someone to bypass the governor by playing with cruise parameters or using an alternate mode.
If you end up with odd behavior like unstable cruise speeds, random cut-outs, or stubborn fault codes after replacement, lean on a structured troubleshooting guide rather than chasing it blindly. A dedicated troubleshooting resource that walks through CAN traffic, ECU parameters, and governor configuration in order can save hours.
Fleet Standardization: Why Mixing Governor Models Creates Problems

On paper, running multiple governor brands and models sounds flexible. In the workshop, it’s usually a headache. Mixed hardware means different software tools, different cable kits, different seal procedures, and a much higher chance of human error under time pressure.
Benefits of standardizing speed governor models
- Single firmware update stream
- There’s one source for firmware, security patches, and new features, so you don’t end up with a patchwork of versions across the fleet.
- Lower risk that older units stay unpatched and drift into non-compliance without anyone noticing.
- Consistent calibration procedures
- Technicians learn one user interface and one calibration routine, which reduces the odds of entering the wrong limits or forgetting a step.
- It becomes straightforward to plan recalibration after replacement or policy changes across the entire fleet in one shot.
- Technician training simplification
- Training programs focus on a single platform, so techs get deep rather than spread thin over five different systems.
- New hires reach full productivity faster and are less likely to make rookie mistakes during governor work.
- Spare parts and inventory reduction
- You carry fewer SKUs for governors, harness adapters, brackets, and seals, which simplifies procurement and stock control.
- Spare units are more likely to be compatible with whatever truck rolls into the bay that day.
- Unified compliance reporting
- With one platform, you can pull the same style of reports for speed events, configuration status, and audit history across all vehicles.
- Showing regulators or insurers that your fleet is governed consistently becomes a straightforward task instead of a spreadsheet nightmare.
Hidden costs of mixing governor models
- Extra downtime as technicians search for the right laptop software, cables, or procedures for each different governor model.
- Higher risk of mistakes during configuration migration and calibration transfer, especially when moving between brands.
- Drivers getting different behavior from truck to truck, which causes confusion, complaints, and sometimes risky workarounds.
- Difficulty rolling out a single, consistent speed or behavior policy across the fleet because some models can’t support the same rules.
Structured services like the Resolute Dynamics replacement program are built to help fleets unwind that diversity over time. They use compatibility matrices, planned rollouts, and standardized commissioning documentation so you gradually phase old governors out without pulling too many trucks off the road at once.
Common Mistakes During Speed Governor Replacement (and How to Avoid Them)
I see the same handful of mistakes over and over on speed limiter jobs. Most are avoidable with a checklist and a bit of discipline. Here are the big ones and how to stay clear of them.
- Skipping configuration backup
- Problem: A tech yanks the old unit without copying parameters, then spends hours guessing at original limits and calibration values.
- Fix: Make configuration backup step one on your commissioning checklist and don’t allow removal until that backup is in hand.
- Assuming CAN protocol compatibility
- Problem: A replacement is ordered based on connector and bracket fit, then fails to communicate properly because the CAN version, PGNs, or baud rate don’t match.
- Fix: Always check CAN standard, baud rate, and message compatibility before buying a unit, ideally using a formal compatibility matrix.
- Using improvised wiring changes
- Problem: Harnesses are cut and spliced based on wire colors or guesses, causing intermittent issues and hard-to-trace electrical noise or shorts.
- Fix: Stick to manufacturer-approved wiring harness adapters and documented pinouts. Only splice when the instructions tell you to and you can record the change.
- Not replacing tamper-proof seals
- Problem: The governor is left unsealed or the old seal is reinstalled, leading to automatic failures on inspections and questions about tampering.
- Fix: Treat tamper seal replacement as a mandatory part of the job and log every seal’s ID and location.
- Skipping post-installation audits
- Problem: Trucks leave the shop without a structured post-install check, so mis-set limits or ECU conflicts slip through to daily operations.
- Fix: Use a standard post-installation audit template and apply it to every replacement, no exceptions.
- Ignoring cost-benefit thresholds
- Problem: Fleets keep repairing outdated units because “they still work,” racking up downtime and repeat visits instead of investing in newer hardware.
- Fix: Implement a clear replacement cost-benefit rule such as “replace if repair quote exceeds 60% of new unit cost including expected downtime.”
FAQ
Below are practical answers to questions that come up over and over again when people start planning a speed governor replacement.
What are the main symptoms of a faulty speed governor?
Faulty speed governor symptoms usually show up as inconsistent or missing speed limiting, random power cuts at speeds that should be fine, or erratic transition when approaching the governed speed. You might see frequent ECU fault codes tied to speed control, CAN messages from the governor dropping out, or an inability to connect with service tools. Before you blame the governor, always check wiring, power, grounds, and sensors so you’re not replacing good hardware for a harness problem.
When is it more cost-effective to replace rather than repair?
From a fleet economics point of view, it’s usually smarter to replace once the repair estimate for parts and labor goes beyond about 60% of the price of a new, compatible governor. That tipping point gets stronger if the existing unit is obsolete, unsupported, or showing repeated failures. Remember to put downtime, missed deliveries, and technician call-backs into the math. Those hidden costs are why a modern replacement often works out cheaper over the next year or two.
Can I transfer my old configuration to the new governor?
Often you can, especially if you stay within the same governor family or brand. Configuration migration tools let you export parameters via USB or OTA and then import them into the new unit. If direct migration isn’t an option, you can manually copy parameters over, but you need to double-check every speed limit, threshold, calibration value, and behavior rule against your records during commissioning so the truck behaves the same way it did before the swap.
Do I need new regulatory certification after replacing the governor?
In most cases you don’t need fresh type approval as long as the new governor carries an equal or higher regulatory certification mark for your region. Some areas, though, expect you to notify authorities, go through a simple inspection, or issue a new seal certificate every time you change the model. Always check your local rules and keep copies of the governor’s certificates on file for each vehicle so you’re ready for any compliance review.
How long does a typical speed governor replacement take?
On a truck you know well, with a compatible governor and proper tools, a full replacement including configuration, testing, and sealing usually takes around 2–4 hours. Jobs involving harness adapters, mounting rework, or thorny ECU integration can stretch longer. Fleet-wide upgrades should be scheduled like any other major maintenance program, with enough technician capacity and planned downtime windows.
Will the replacement affect my vehicle warranty?
A correctly specified, certified governor that follows the vehicle manufacturer’s integration guidelines generally won’t cause warranty issues. Problems start when installers improvise wiring, tap into circuits the OEM didn’t approve, or ignore recommended mounting and sealing practices. Use trained or authorized installers where you can, and keep thorough documentation of the commissioning checklist, wiring diagrams, and integration steps to support any warranty discussions later.
Do I need to recalibrate my speed limiter after replacement?
Yes, you should always verify calibration after a swap. Even if you’ve used configuration migration, you still need to confirm that the displayed and logged speed matches actual road speed at several points. That means checking wheel size and axle ratio settings, speed sensor scaling, and any ECU-specific parameters that interact with the governor. For more detailed calibration methods, refer to your calibration procedure resources or the specific documentation referenced in your system.
What is a commissioning checklist and why is it important?
A commissioning checklist is a structured list of tasks and sign-offs completed after installing or replacing a speed governor. It usually covers configuration restore, parameter verification, DTC scans, drive test results, cruise control checks, seal application, and documentation. The checklist keeps people from skipping steps during busy days, ensures consistent work quality, and gives you a clear audit trail showing how and when each governor was put into service.
How does fleet standardization save money during replacements?
Fleet standardization cuts waste in a lot of little places that add up. Running one governor platform means less stock to carry, shorter training time for technicians, and fewer configuration errors. You can roll out firmware updates and policy changes across the whole fleet at once instead of unit by unit. Over time, fewer misconfigurations, less downtime, and faster replacements usually outweigh the upfront effort of moving to a single standard model.
Where can I get help if diagnostics suggest replacement is needed?
Once diagnostics confirm that repairing the existing governor won’t give a reliable long-term fix, use the compatibility checklist in this guide to narrow down suitable replacements. Combine those findings with a downtime and cost analysis from a downtime calculator so management sees the full picture. If you want outside help, programs like the Resolute Dynamics replacement program can assist with model selection, compatibility verification, migration planning, and staged rollouts across your fleet.
Final Summary and Next Steps
Replacing a faulty speed governor is a technical and regulatory job, not just a parts swap. You need a firm match on CAN protocol version, ECU interface method, mounting and wiring, and regulatory certification. On top of that, you have to move configuration over carefully and verify behavior on the road so you don’t introduce ECU conflicts or compliance gaps.
To move forward safely and efficiently:
- Use the compatibility checklist to choose a replacement that actually fits your vehicle’s electronics, hardware, and legal environment.
- Follow the structured decommission, install, verify, and seal process on every swap so nothing critical gets missed.
- Put a fleet standardization policy in place so each future replacement becomes faster, cheaper, and easier to control from a compliance perspective.
- Lean on related resources for diagnostics, calibration practice, tamper seal rules, and post-install audits using the internal links and procedures already in your documentation set.
Whether you’re looking after a handful of trucks or a national fleet, treating speed governor replacement as a disciplined, documented process cuts downtime, improves safety, and makes life a lot easier when regulators or insurers come asking for proof that your vehicles are properly limited.
Related reading: ECU Interference Guide and Installation Troubleshooting Guide.

The Resolute Dynamics team designs and manufactures speed limiters (SLD), GPS tracking, and automotive safety systems used on 200,000+ vehicles across 20+ countries. We write about fleet compliance, road-safety regulation, and vehicle-safety technology, including Malaysia’s JPJ SLD mandate, UAE RTA rules, and global standards like UN R89, to help fleet operators and transport businesses stay safe and compliant.